
 ——–
——–
Hi! How are ya?
I promised that I'd share an embroidery project with ya. Feeling REALLY good about the fact that I snapped enough pix of the steps that I can actually give you a fairly decent tutorial! *LOL* Ready? Here we go!!!
Step 1: Decide on image you wish to stitch. Inspiration can come from anywhere (just ask my kids)...in this case, Middle Child and Youngest Child both wanted me to stitch one of their favorite cartoon characters, Gir, from Invader Zim. So, after a brief Google search on the WWW, I came up with 2 images - one of Gir in his regular form and one of him in his "disguise." The boys decided they each liked BOTH images, so double-sided pillows were the call. I printed off the images...
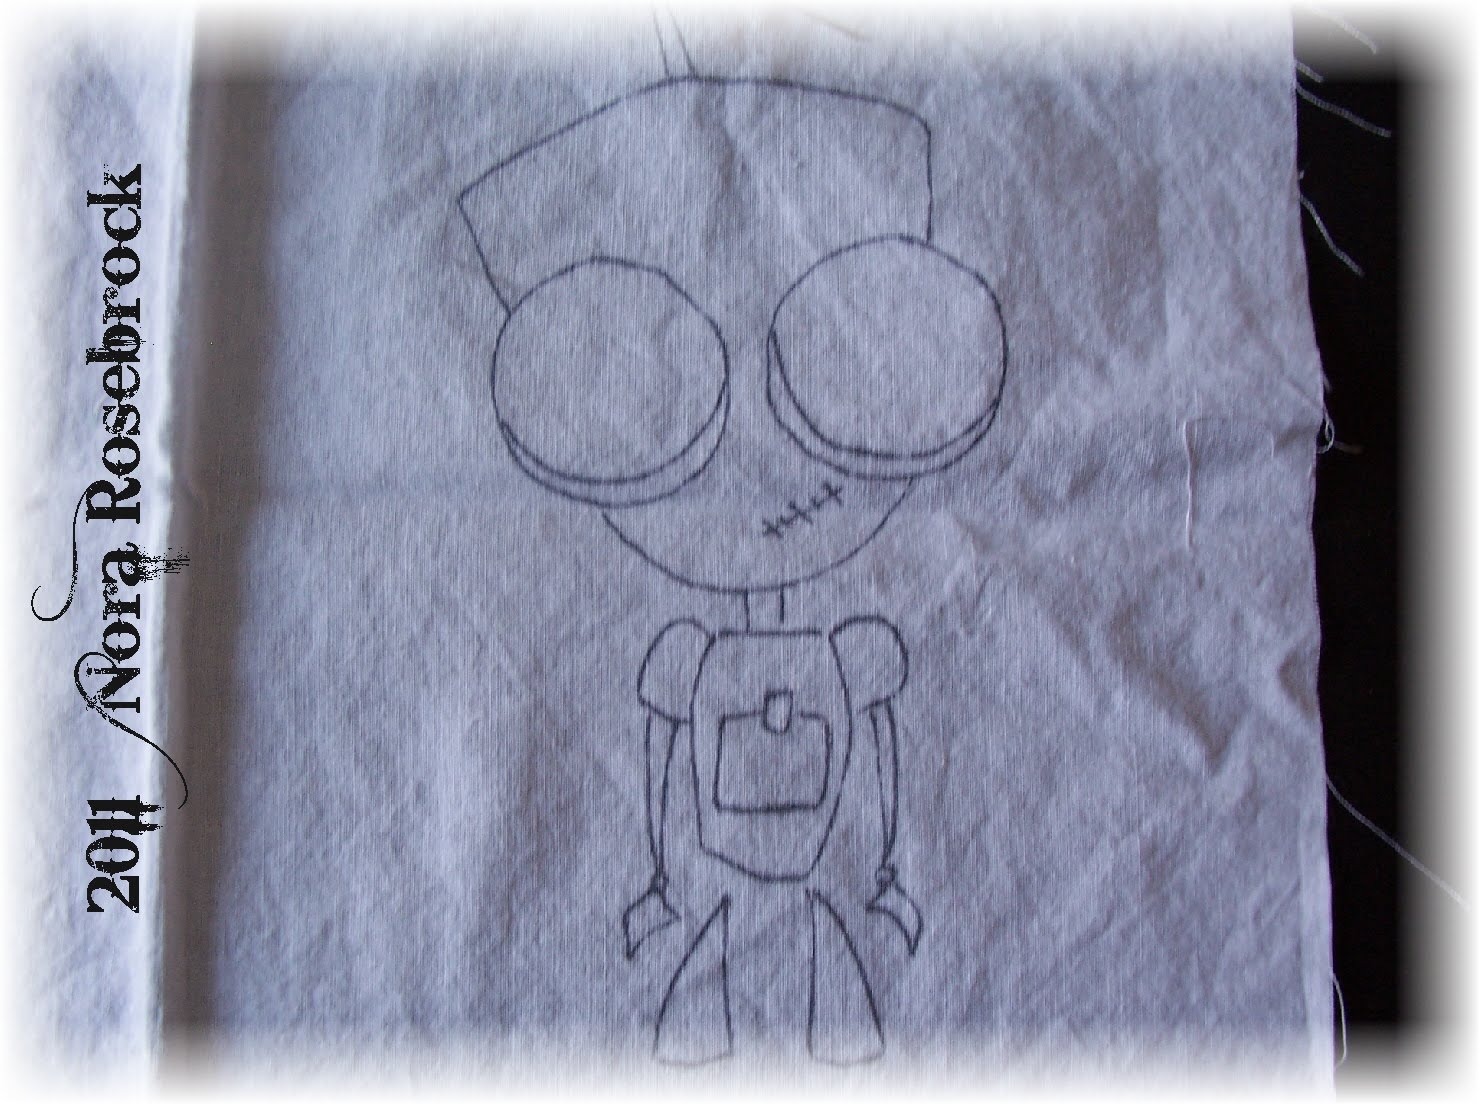
 Step #2: Get your basic outline for stitching by laying tracing paper over the original design.
 Step #3: Using a light source (light table or tape the images & blank fabric to your sunniest window), trace the designs onto your material. You can use a fabric pen, pencil, or an ultra fine point sharpie (test the fabric in an inconspicuous spot to make sure your pen isn't going to bleed).
 Step #4: Stitch. I used 3 strands of DMC rayon floss for each image, with warm n natural batting behind the fabric for some quilted dimension (optional). At this point, I'm not worried about the wrinkles in the fabric.
 Step #5: Grab your kids box of crayons, or, if you're like me, you've got your own private stash. Stretch the fabric with your hands & color the fabric till you get the look you're going for. On mine, I used the original printed images (step #1) as my color guide.
 Step #6: Grab waxed paper, plain news print or printer paper, and your iron. Set your iron to COTTON. Pull off enough waxed paper to cover the image.
 Step #7: Lay your news or printer paper OVER the waxed paper...
 Step #8: Using a fairly firm pressure, iron over your image. The waxed paper & heat from the iron help to seal the color into the fabric.
 Step #9: Repeat steps 6-8 for each image you're setting into fabric. This time around, I had to do it FOUR TIMES.
 Step #10: Using your machine, set on straight & normal length stitches, sew 3 sides of your pillow together, leaving one side open for stuffing (I leave the bottom).
Step #11: Stuff pillow to a fullness of your preference.
Step #12: Blind stitch pillow shut or use machine to close seam.
And you have two of the cutest, not-your-normal-kind-of-embroidery-project, pillows EVAH!


The boys really love their little pillows & I hope you enjoyed this tutorial. Any questions? Leave me a comment & I'll do my best to get back to ya ASAP. If you make a project using today's lesson, leave me some love & let me know where to find you or send me an e-mail with pix - I'd love to see!
Gotta have a "Gir Moment"
I'm linking this post to ~~


Thanks for stopping by & have a great rest of your day!!


 table, tr, td, li, p, div {font-family:Lucida Handwriting; color:000000; font-size:18px;}.btext {font-family:Lucida Handwriting; color:000000; font-size:18px;}.blacktext20 {font-family:Lucida Handwriting; color:000000; font-size:18px;}.blacktext20 {font-family:Lucida Handwriting; color:000000; font-size:18px;}.lightbluetext12 {font-family:Lucida Handwriting; color:000000; font-size:18px;}.orangetext15 {font-family:Lucida Handwriting; color:000000; font-size:18px;}.redtext {font-family:Lucida Handwriting; color:000000; font-size:18px;}.redbtext {font-family:Lucida Handwriting; color:000000; font-size:18px;}.text {font-family:Lucida Handwriting; color:000000; font-size:18px;}.whitetext12 {font-family:Lucida Handwriting; color:000000; font-size:18px;}a:active, a:visited, a:link {font-family:Lucida Handwriting; color:000000; font-size:18px;}a:hover {font-family:Lucida Handwriting; color:000000; font-size:18px;}a.navbar:active, a.navbar:visited, a.navbar:link {font-family:Lucida Handwriting; color:000000; font-size:13px;}a.navbar:hover {font-family:Lucida Handwriting; color:000000; font-size:18px;}a.redlink:active, a.redlink:visited, a.redlink:link {font-family:Lucida Handwriting; color:000000; font-size:18px;}a.redlink:hover {font-family:Lucida Handwriting; color:000000; font-size:18px;}.nametext {font-family:Lucida Handwriting; color:000000; font-size:18px;}
4 comments:
LOL!! These images make me smile! What a very cool tutorial hun!! TFS!! HUGS
Wow... I've got to try this!!! thanks for the pics that helps! :)
Your tutorial fit in so perfectly with my post I'm sharing it on my blog.Thanks for doing such a great job on it-
Wendy
www.wmcraftgoodies.blogspot.com
Such a fantastic tutorial! My nephew would just love these pillows!
Wanted to let you know I'm passing on the Versatile Blogger Award to you! Check out my blog for all the details and great job!
Natalie
http://aturtleslifeforme.blogspot.com/
Post a Comment